

First, make sure Java is installed as described here: install Java.
Eclipse IDE for Java Developers is the recommended IDE for writing and running your CS 200 Java programs. You can download and install this software on your personal computer for free. And if you ever have any trouble working from your personal computer (or if you prefer to work in public), this software is available on the computers in the CS computer labs which you can access using your CS Account credentials.
If you have any problems with any of the following steps, feel free to discuss them on Piazza or stop by consulting hours in the cs lab for help. For example: If you are using macOS Catalina and get a “Failed to Create Java Virtual Machine” error during Eclipse installation then try using Java 8, rather than Java 11.
- Follow the link: Eclipse IDE for Java Developers to download Eclipse Installer for your OS. Then Open the Installer.
- In the Chrome browser on Windows this looks like:
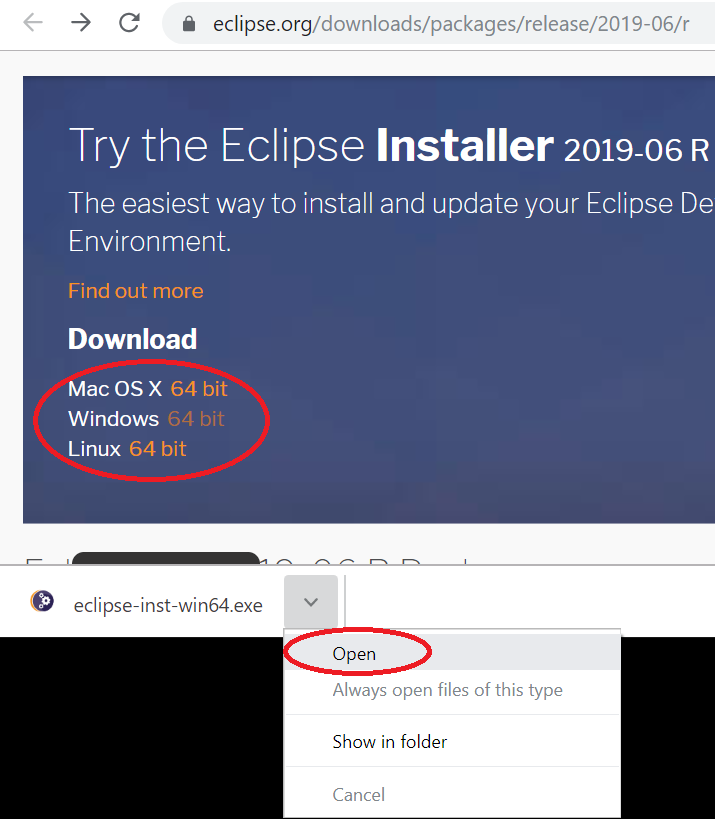
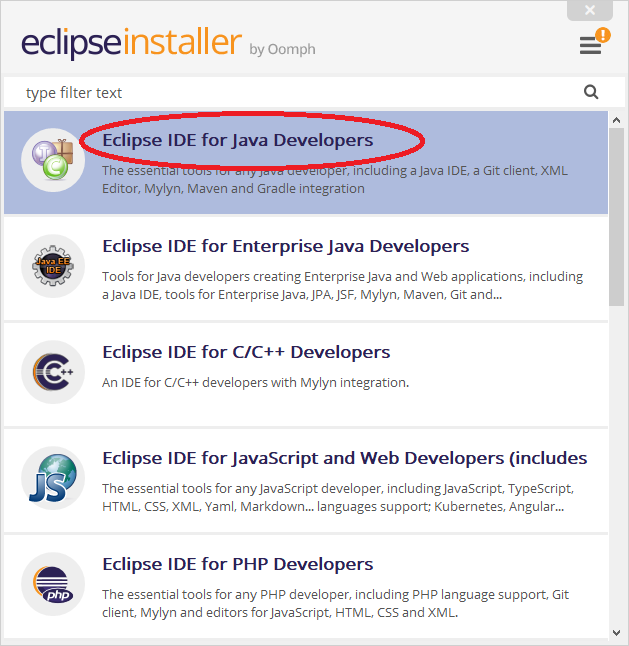
- It may take a while to download and a while for the installer to open. When the Installer opens select Eclipse IDE for Java Developers.
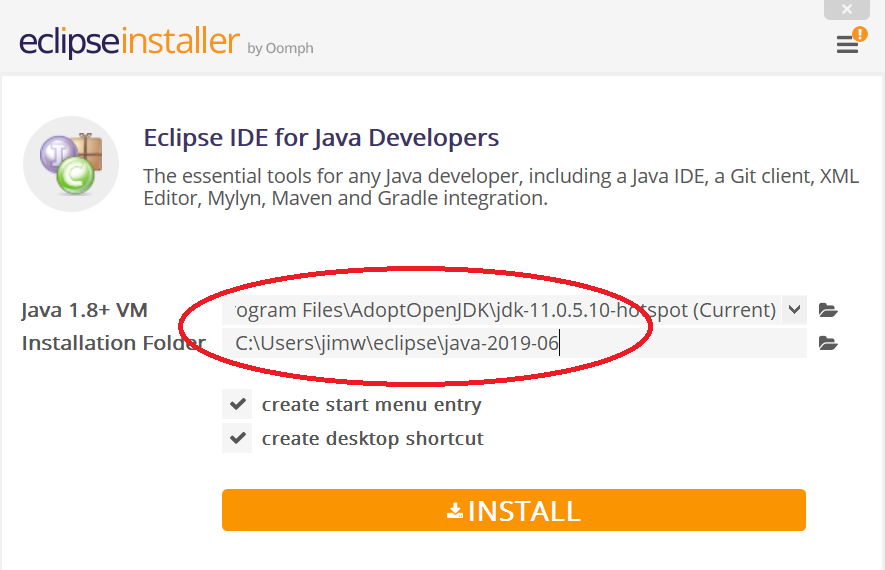
- Verify the appropriate Java VM is found (our suggestion is the AdoptOpenJDK) and the installation folder before clicking Install.
- There may be a prompt to verify the certificates. When installed click Launch.
- You will be prompted to “Select a directory as workspace”.
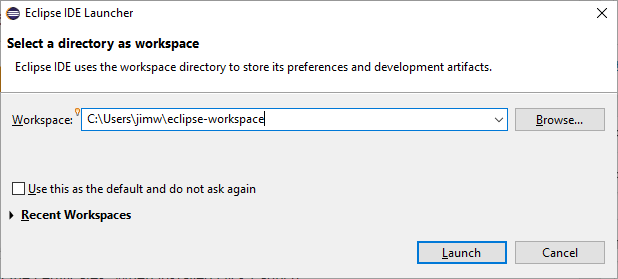
This is where your new Eclipse project folders and files will be saved in the future. You’ll need to access these files to back them up as you progress through assignments, and also to upload the source code from your assignments to zyBooks for grading. So choose a location that you can remember and navigate to easily in the future.
Next Tutorials: